Audio Localization
There are two features in EasyTalk which are provided to conveniently assign localized audio files to lines of dialogue: automatic audio assignment and manual audio assignment.
Automatic Audio Assignment
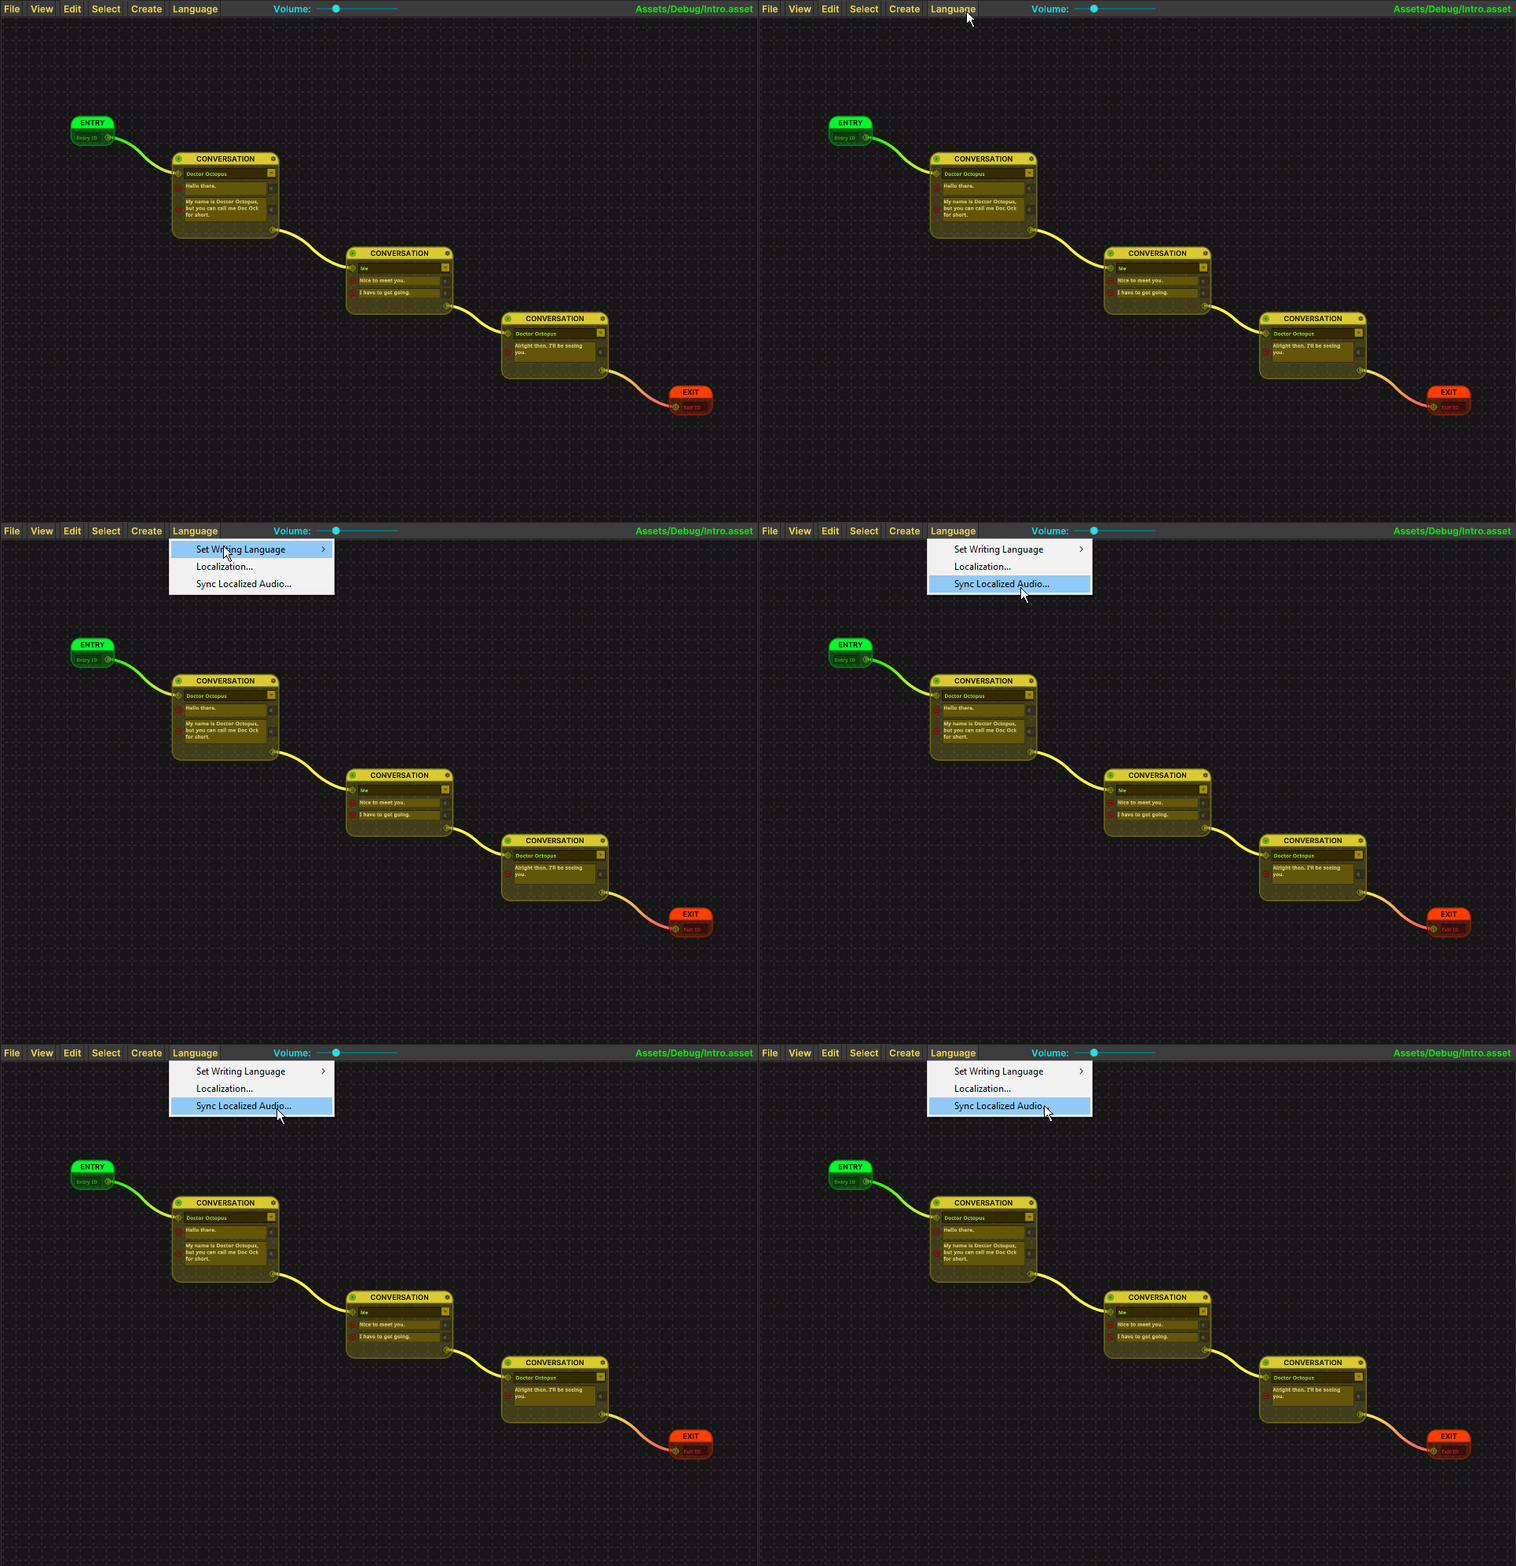
Automatic audio assignment works by finding all audio files using a particular naming convention relating audio files to translated lines of dialogue.
After saving a Dialogue asset, the Translation Library for that asset is automatically generated, and an ID is assigned for each unique line of dialogue. Once this Translation Library exists, you can choose a folder which contains the audio files for the Dialogue asset and as long as they are named using certain conventions, the system will automatically locate the audio files for each language and connect them to the dialogue so that when the EasyTalk language is changed during runtime, the proper language's audio will play.
To use the automatic audio syncing feature, in the EasyTalk menubar, choose Language -> Sync Localized Audio..., and then choose the folder which contains your audio files.
Audio files can either be directly in the folder chosen, or in subfolders. To use subfolders, the folders must be named using the ISO-639 code of the language the folder, or the English name of the language the folder is for.
Audio files themselves must also follow one of three naming conventions:
- ISO-639 code, followed by an underscore, followed by the translation ID. (e.g. en_1.mp3, es_12.ogg, fr_27.wav, etc.)
- English name for the language, followed by an underscore, followed by the translation ID. (e.g. english_1.mp3, spanish_12.ogg, french_27.wav, etc.)
- The translation ID (e.g. 1.mp3, 12.ogg, 27.wav, etc.)
When using the translation ID alone for naming audio files, the files must be placed in a folder named after the language (using the English name of the language or the ISO-639 code). If this isn't done, the audio files will be assumed to be in the default writing language.
The recommended approach for naming audio files in different languages is to use the ISO-639 code, followed by an underscore and the ID of the line of dialogue (found in the Translation Library or CSV files exported from a Translation Library).
Example Setup
We want to support English, Spanish, and French languages.
We have 2 Dialogue assets: Intro.asset and Home.asset, which have Translation Libraries like below.
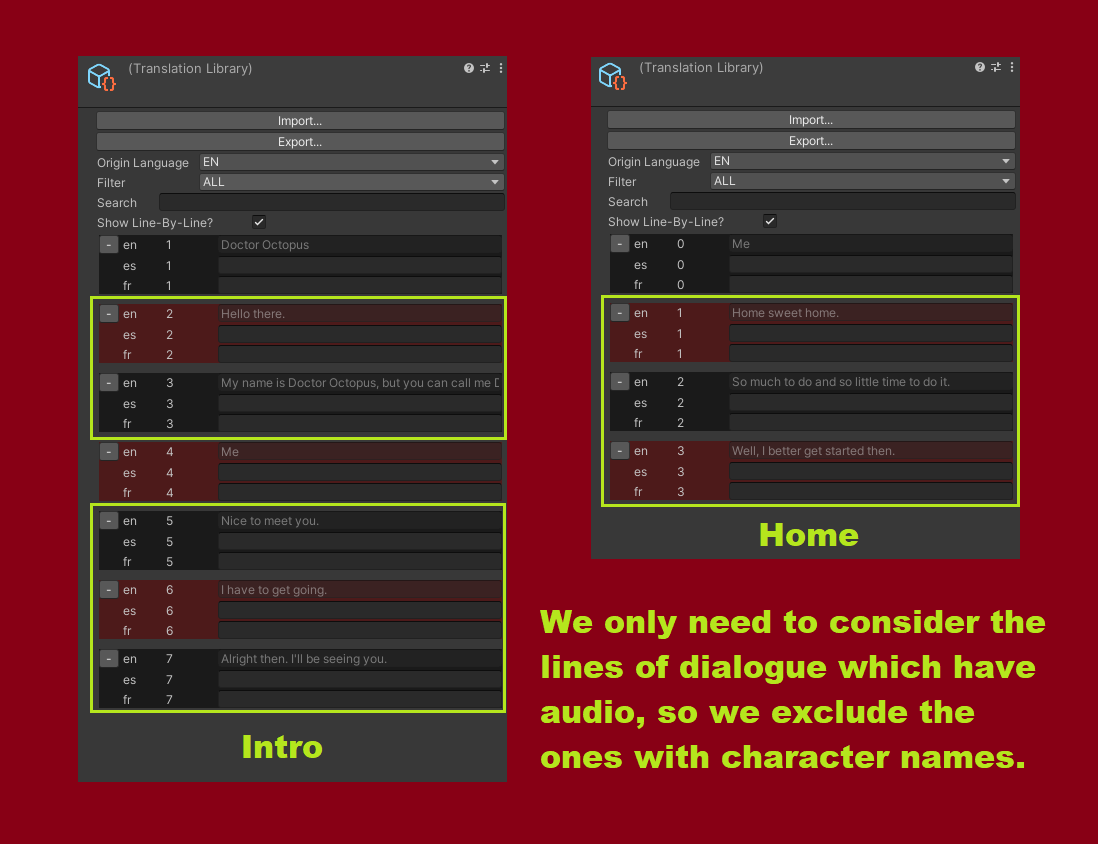
We create 2 folders in our "Dialogues" folder: "Intro" and "Home", and for each relevant line of dialogue (spoken lines, excluding character names like "Me" and "Doctor Octopus"), we create an audio file in each language we are supporting.
Our final file structure looks like this:
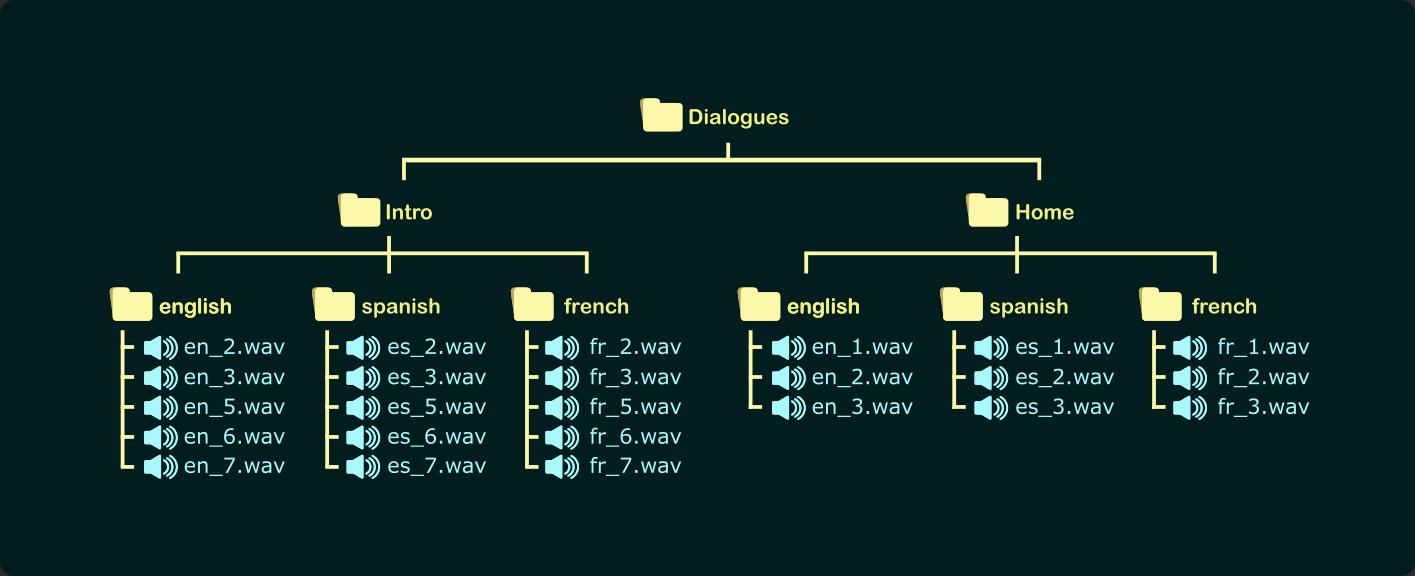
Now that we have our file structure in place, we can sync our dialogue to our audio by opening each Dialogue asset and going to Language -> Sync Localized Audio... and then choosing the appropriate folder for that Dialogue ("Intro" folder for the Intro Dialogue, "Home" for the Home Dialogue, etc.).
Manual Audio Assignment
Manual audio assignment is useful for if you have a small number of audio files and don't want to have to set up a specific folder structure, or if you are making a minor change to a dialogue, or when you have alternative versions for a line of dialogue, where the text may be identical to another line, but the emphasis and emotion of a particular line is different than the other.
You can manually assign localized audio files for each of your lines of dialogue on Conversation Nodes and Append nodes by opening the Settings panel with the node selected and expanding the "Audio Localization" section:
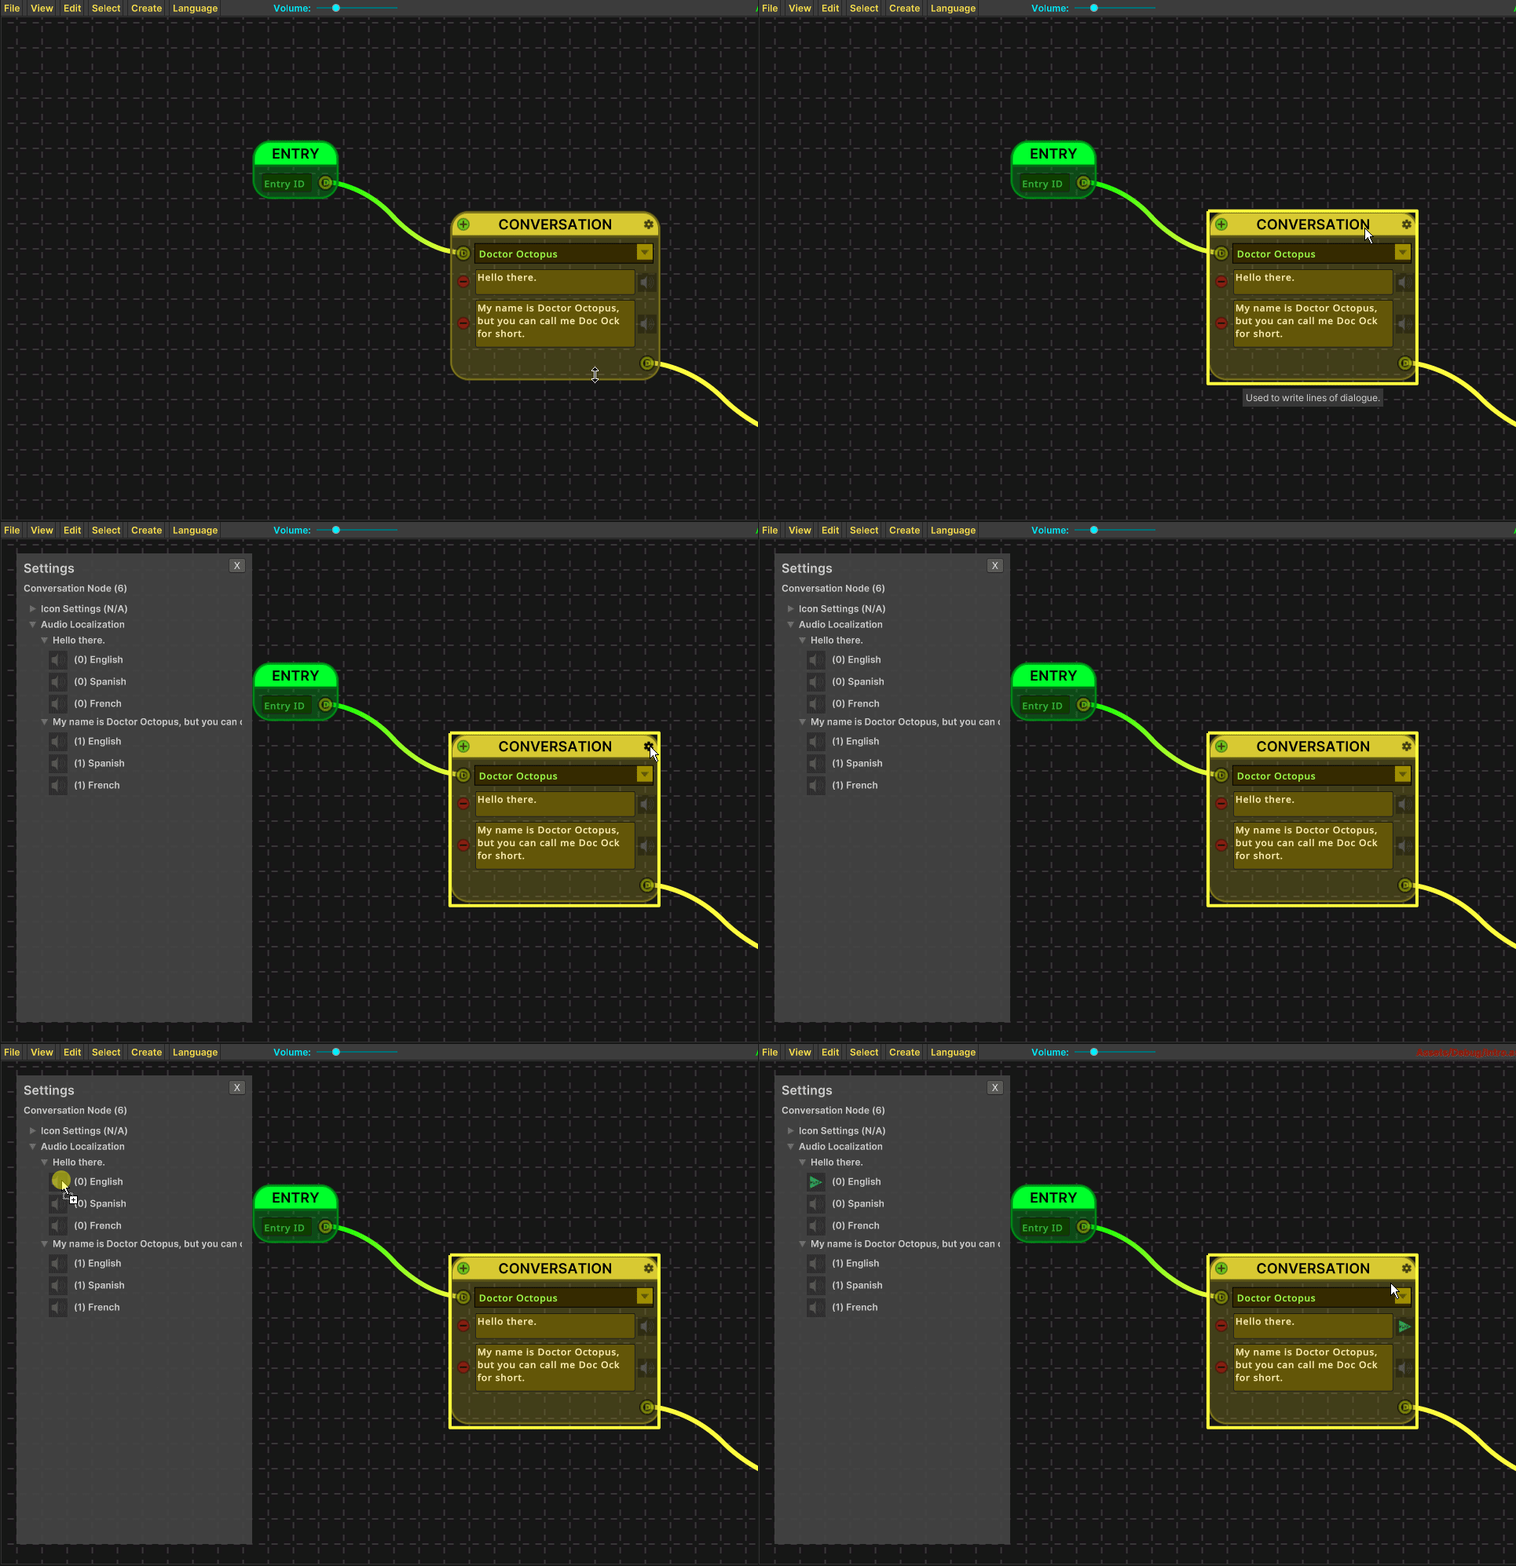
Here, you can assign different audio files manually by dragging and dropping audio clips from the Unity project browser onto the audio icons:
To unassign an audio file, just right-click on the clip icon.